2FA in ImageCapture: have you set it up yet?
In an era where digital security is playing an increasingly prominent role, it is essential to take the protection of our online accounts seriously. With the ongoing threat of cyber attacks and the increasing complexity of digital threats, implementing robust security measures such as two-step authentication (2FA) has become critical.
Two-factor authentication in ImageCapture
One of the most effective methods to strengthen the security of online accounts is to implement 2FA, also known as multiple authentication (MFA). This approach requires not only entering a password, but also a second authentication step, such as a unique code sent to a trusted device. This additional level of security makes it significantly more difficult for cybercriminals to gain unauthorized access to accounts, even if they obtain the password.
In this guide, we will explain step by step how to set up and use 2FA in ImageCapture, an essential step to ensure the security of your account and protect your data from potential threats.Volg de onderstaande stappen nauwkeurig om je digitale veiligheid te versterken en met vertrouwen gebruik te maken van ImageCapture.
Step 1: Logging into ImageCapture
To get started, log in to ImageCapture with your own unique link.
Do you already log in with two-factor authentication? Congratulations! Your ImageCapture environment is set up to be as secure as possible. This blog does not apply to you.
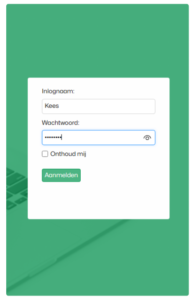
Go to the ImageCapture login page and enter your login credentials.
You are now logged in without 2FA ImageCapture
Step 2: Set up two-factor authentication
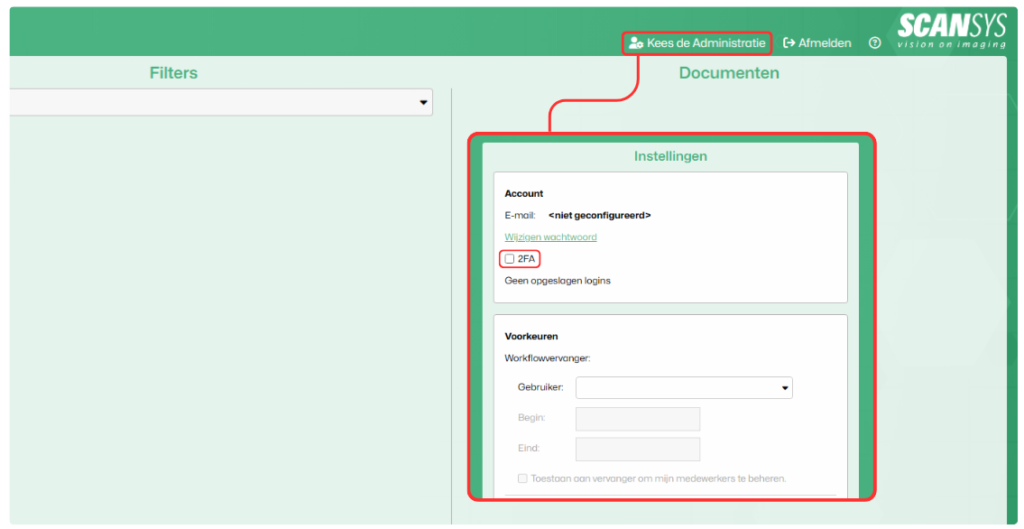
- Go to the account’s user settings. In the user settings, you will see the option to enable 2FA.
- Check it and follow the instructions.
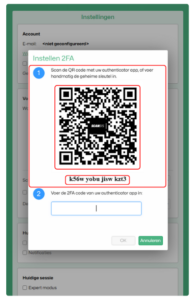
- A pop-up will now follow to set up 2FA, which requires an authentication app.
Step 3: Download an authentication app and authorize ImageCapture
Do you already have an authentication app on your phone? Continue to step 3.2.
- Make sure you install an authentication app on your cell phone. For example, the Microsoft authentication app; Microsoft Authenticator.
- Follow your authentication app’s instructions to register ImageCapture. This usually involves scanning a QR code or entering the secret key.
Step 4: Set up 2FA in ImageCapture
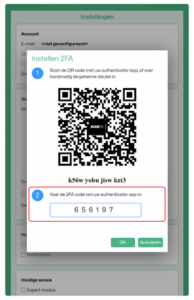
- After you register ImageCapture in your authentication app, the app generates a time-based code.
- Enter this code in the appropriate field on the ImageCapture website.
Congratulations! You have successfully set up 2FA.
Your ImageCapture environment is now significantly more protected. Your 2FA journey does not end here. How does logging in with a set 2FA work in ImageCapture and how do I manage my 2FA settings? You’ll find the answers in the following next steps.
Step 5: The next log-in
-
At the next login, you will encounter 2FA in ImageCapture in the form of a pop-up.
-
Use your authentication app to find out the time-based 6-digit code.
-
Enter this 6-digit code, in the ImageCapture 2FA pop-up screen.
-
Optional: You can choose to register the device as trusted. This will not prompt for a 2FA code on subsequent login attempts from the same device.
Step 6: Managing stored logins
There may be a need to manage 2FA settings and disconnect devices. This is done in the following way:
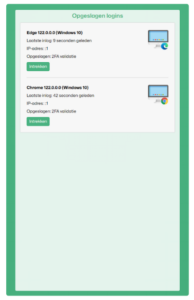
- After logging in, you can view saved logins under your user settings.
- Here you can also revoke saved logins so that a 2FA code is required at the next login.
Short FAQ
Q: I have a new phone, now what?
A: If you’re working with the Microsoft Authenticator app, you’ll find the information you’re looking for here.
If you can’t figure it out, Scan Sys support is happy to help.
Q: I want to reset my 2FA.
A: Scan Sys support can reset your 2FA settings. The next time you log in, you will be able to register your 2FA again.
Q: I can’t figure it out! Can you help me?
A: Of course. Please contact Scan Sys support! We are happy to help you.
